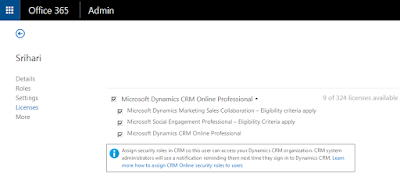
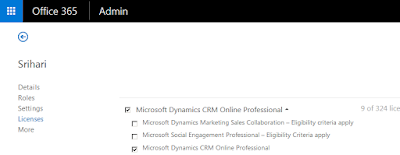
This is the third article in the series of using PowerShell with O365 and CRM. The first article was an Introduction To PowerShell Using O365.html and the second one was Assign or Remove a CRM license to a user using PowerShell in O365 In this article, we will be taking this one step further and
Bulk Assign Licenses
Bulk Remove Licenses
The below code will be used to remove the CRM licenses
- Assigning/Removing CRM licenses in bulk by reading from a file
- Add error handling logic when assigning licenses
- Output the results to the command prompt and prompt the user if he/she wishes to export the results.
- Export the results out into csv file along with any error reasons for further reference and troubleshooting
First, we will create a file with the list of users that need to be assigned with a CRM license. Please note that in order to assign a license to a user, we need to obtain the UserPrincipalName of the user. This is generally of the format username@domainname.com. Below is the format of the file that I have used. I will call this file "Users.txt"
Bulk Assign Licenses
Now, let's launch PowerShell ISE and get started with the code to assign licenses to the above users. Obviously, before we assign a license to a user, we need to ensure that we have enough available licenses or else the code will throw an error. Check out my Introduction article on how to find out the number of available licenses.
I have added lots of comments to my code below and hence most of it is self-explanatory. Here is the complete script to bulk assign users
#-------------------------------------------------------
# Purpose        : To assign O365 CRM license to users
# Author         : Srihari Radhakrishnan
# Created On     : November 30 2015
#-------------------------------------------------------


Connect-MsolService

#Declare the path for the users
$UsersInputFilePath = Get-Content "D:\Users.txt" # Declare the file from which the user email addresses should be picked
$UsersOutputFilePath = "D:\UserLicenses.csv" # Declare the output file where results should be exported to
$Output = @() # Create an array to store the output results

#Add the license service options that need to be disabled when assigning a standard CRM license

# To find the additional service options that get enabled when assigning the CRM License, please use the code below to check
# Get-MsolAccountSku | Where-Object {$_.SkuPartNumber -eq "CRMSTANDARD"} | ForEach-Object {$_.ServiceStatus}

#Results
#-----------------------------------------------------------------------------
# MDM_SALES_COLLABORATION = Microsoft Dynamics Marketing Sales Collaboration
# NBPROFESSIONALFORCRM = Microsoft Social Engagement Professional
#-----------------------------------------------------------------------------

#Create the License Options with the Disabled Service Plans
$CRMLicense = New-MsolLicenseOptions -AccountSkuId testinc:CRMSTANDARD -DisabledPlans MDM_SALES_COLLABORATION, NBPROFESSIONALFORCRM

#Iterate through the users file and assign the licenses.
foreach($user in $UsersInputFilePath)
{
    #Set the CRM License to the user while disabling the additional services for that license
    Try
        {
            $ErrorActionPreference = "Stop" # Declare $ErrorActionPreference in order to catch the non-terminating error while assigning the licenses
            Write-Host "Assigning License for " $user;
            Set-MsolUser -UserPrincipalName $user -UsageLocation "US"
            $LicenseOutcome  = Set-MsolUserLicense -UserPrincipalName $user -AddLicenses "testinc:CRMSTANDARD" -LicenseOptions $CRMLicense
            if($?)
            {
                Write-Host "Success"
                $user | Add-Member -Type NoteProperty -Name Username -Value $user
                $user | Add-Member -Type NoteProperty -Name Result -Value "Success"
                $Output+=$user
            }
        }
     Catch
        {
            Write-Host "Exception occured while trying to assign the license for the user " $user; # Write the custom error
            Write-Host $Error[0].Exception; # Throw the actual error
            $user | Add-Member -Type NoteProperty -Name Username -Value $user
            $user | Add-Member -Type NoteProperty -Name Result -Value "Failure"
            $user | Add-Member -Type NoteProperty -Name ErrorReason -Value $Error[0].Exception
            $Output+=$user
        }
     Finally
        {
            $ErrorActionPreference = "Continue"; # Reset $ErrorActionPreference variable so that the loop can continue
        }

}

$Input = Read-Host -Prompt "End of Process. Do you want to export the results? Type Y/N"
if($Input -eq "Y")
{
  $Output | Select-Object UserName, Result, ErrorReason | Export-Csv $UsersOutputFilePath -NoTypeInformation
  Write-Host "CSV Exported to " $UsersOutputFilePath
}
else
{
  exit
}
Bulk Remove Licenses
The below code will be used to remove the CRM licenses
#-------------------------------------------------------
# Purpose        : To remove O365 CRM license from users
# Author         : Srihari Radhakrishnan
# Created On     : November 30 2015
#-------------------------------------------------------

Connect-MsolService

#Declare the path for the users
$usersFile = Get-Content "D:\Users.txt"

#Iterate through the users file and remove the licenses.
foreach($user in $usersFile)
{
     Try
        {
            $ErrorActionPreference = "Stop" # Declare $ErrorActionPreference in order to catch the non-terminating error while assigning the licenses
            Write-Host "Removing License for " $user;
            $LicenseOutcome  = Set-MsolUserLicense -UserPrincipalName $user -RemoveLicenses "testinc:CRMSTANDARD"
            if($?)
            {
                Write-Host "Success";
            }
        }
     Catch
        {
            Write-Host "Exception occured while trying to remove the license for the user " $user; # Write the custom error
            Write-Host $Error[0].Exception; # Throw the actual error
        }
     Finally
        {
            $ErrorActionPreference = "Continue"; # Reset $ErrorActionPreference variable so that the loop can continue
        }

}

Read-Host -Prompt "Press any key to Exit"


