I was trying to setup Server Side Synchronization using CRM Online and Exchange online as part of the Office 365 offerings. For some reason, I found the process to be somewhat confusing.
After several trial and error sessions, I have documented the below process that has always worked for me since. Hope this helps someone out there as well :)
1. First, create a CRM Online Trial Account
2. Then from the portal (https://portal.microsoftonline.com/), under Admin - Select Office 365
3. Choose Purchase Services and choose Trial for Office 365 Enterprise E3 trial or above.
4. Choose all the services and wait for approx. 10 mins for the services to get activated.
5. After purchasing the E3 Trial, we need to ensure that all the users in the organizations are also assigned to the purchased subscription. To do that, click on “Users and Groups” and select the users in your organization and then click on Edit
6. Then navigate to “Licenses” and then select all the subscriptions licenses and then click on Submit.
7. Wait until all your subscriptions in the command bar and under the Admin section get enabled as shown below:
8. Login into CRM. Click on Settings and go to System Settings. In the email tab, set everything to Server Side Synchronization and click on OK
9. Then click on Settings and choose Email Server Profiles
10. Open the currently Active Email Server Profile
11. Set the Auto-Discover to “No” and specify the Incoming and the Outgoing Server location as shown below (This should ideally work with “Auto Discover” set to “Yes” but for some reason it was not working for me unless I give the credentials as specified below).
12. Click on Mailboxes->Select all the mailboxes and then click on “Apply Default Email Settings”
13. Then click on “Test and Enable Mailboxes”. Ensure that the status for Incoming and Outgoing is successful.
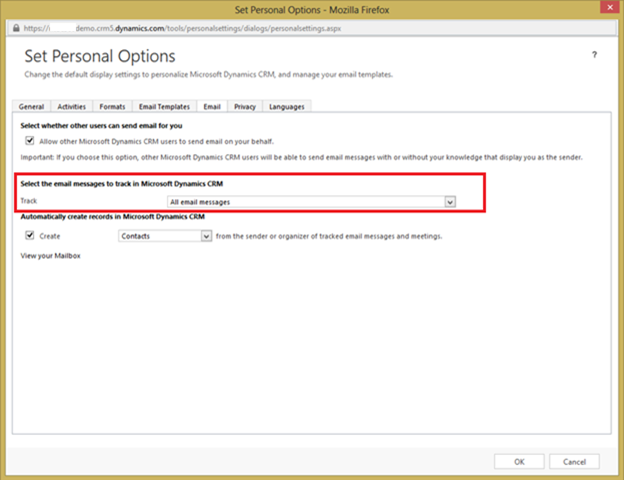
14. (Optional): Finally, go to the user’s Personal Options page. Set the Track emails options to track “All email messages”. That’s it.


